My nails are the worst when it comes to wearing nailpolish. Regular polish will last perfectly on my nails for about six hours before it starts chipping. I’ve tried everything, but I think my nails are just too brittle. Gel nailpolish has been around for a while, and seems like a great solution to my problem. Doing gel manicures at home has become very accessible nowadays, so I was really excited to try it!
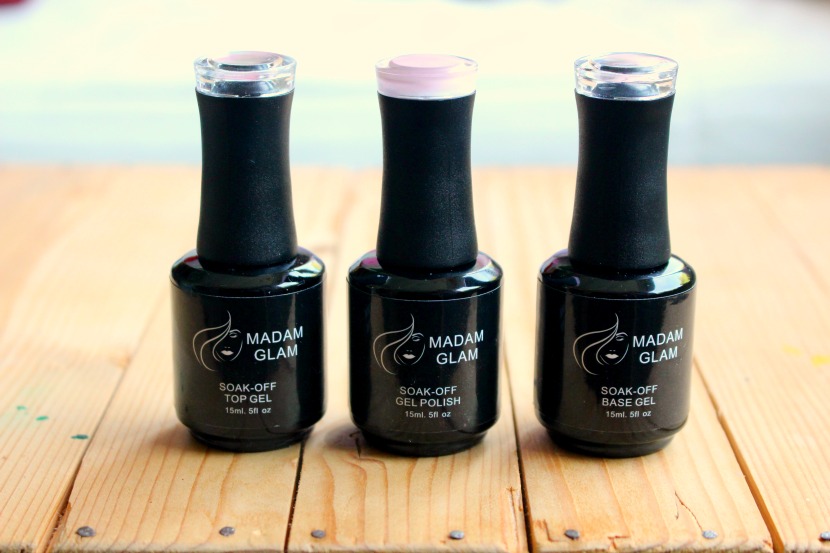
A while back, I received a gel nailpolish set from Madam Glam. The gel polishes are new in their collection, so I wanted to try them out! Before investing in a UV/LED lamp (Madam Glam doesn’t sell one), I wanted to see how I liked the polishes. So I met up with a friend who owns two gel nailpolish sets, with lamps. I decided to try all three gel polish sets, so I could compare the Madam Glam gel polish to the Essence Gel Nails At Home and Sensationail.
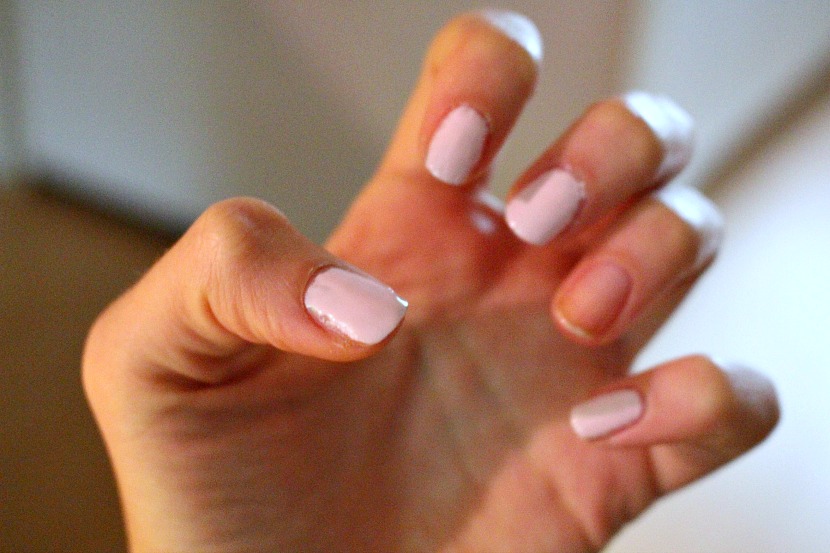
Since my friend only had Sensationail in red, and I only had Madam Glam polish in pink, I did a pink manicure with a red accent nail. I applied Sensationail on my left ring finger, and Madam Glam on the rest of my left hand. On the right hand I applied Essence on all fingers. The Essence set provides you with a gel base and top coat that you can apply your own nail polish in between, so I did pink with a red accent nail again.
This is the first time I’ve ever done a gel manicure, so I was relying on my friend to guide me through it. The Madam Glam polish didn’t come with instructions other than the curing time of the polishes; the process is pretty straightforward but some type of guide for rookies like me would be nice to have!
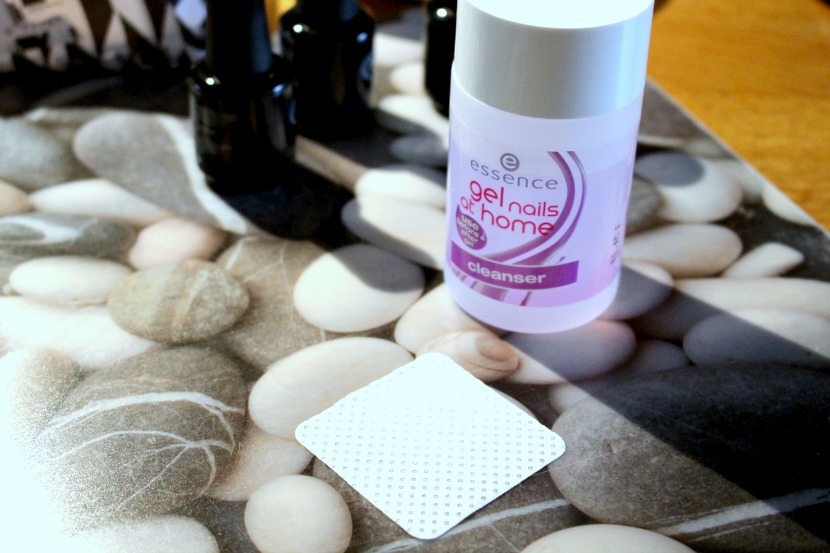
First of all, you need to clean the nails with cleanser and a fuzz-free cotton pad. I used the Essence cleanser for this.
For the Madam Glam nailpolish, the next step is to apply the base coat. Both the Essence and Sensationail kits come with a primer you need to apply first, but for Madam Glam you go straight in with the gel base. Be sure to do this carefully and not get any on your cuticles, or the polish will peel off faster! The back of the base says to cure it under a LED lamp for 30 seconds, or a UV lamp for 2 minutes.
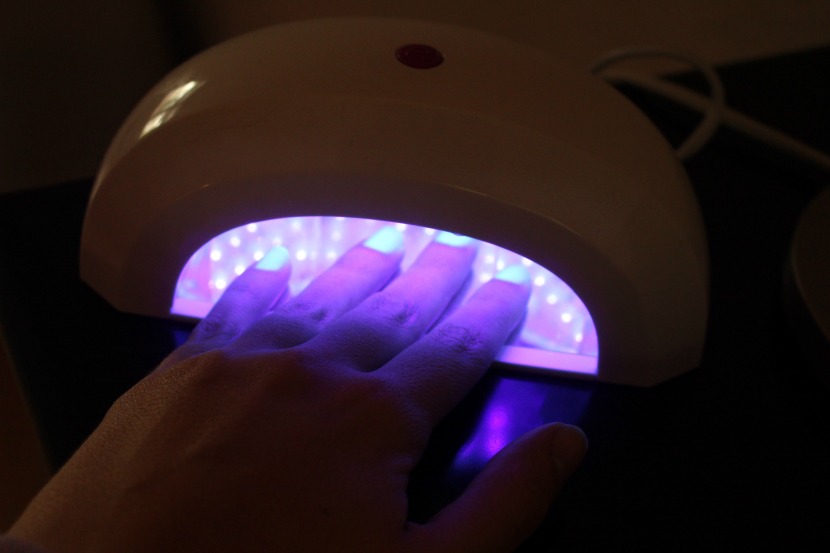
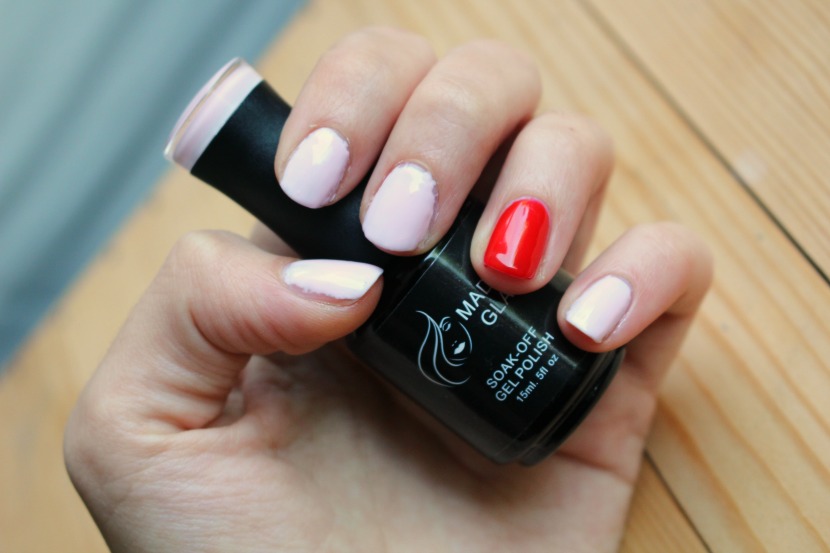
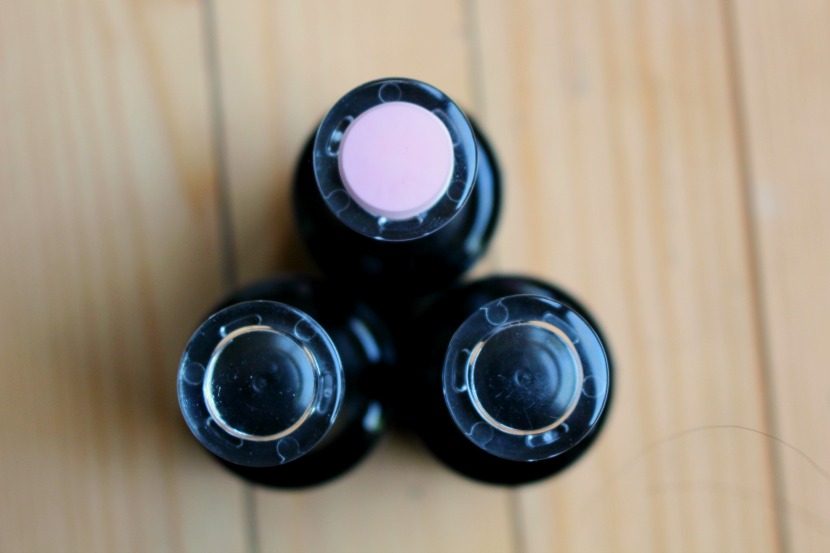
Now the base will have hardened, and you can apply the colour gel over it. The first time I tried the Madam Glam gel polish, this happened:
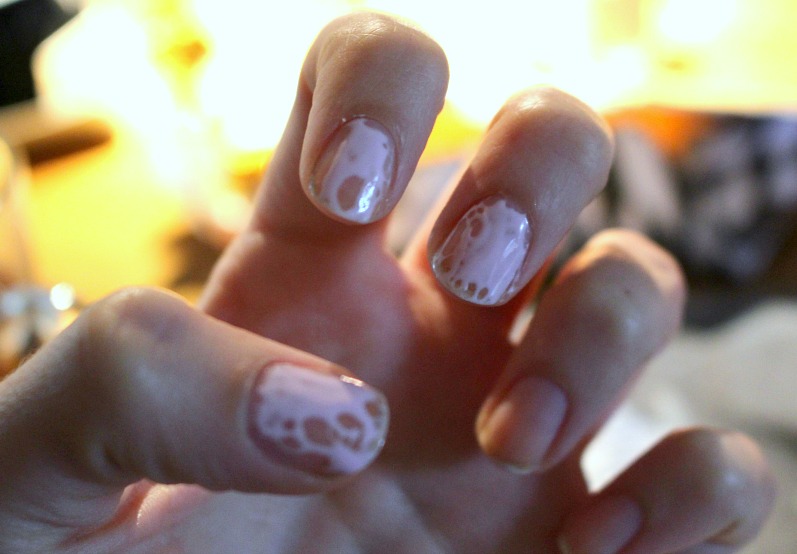
Woops! I sent an email to the company and they said this likely happened because I didn’t use the cleanser in between steps. I tried again, and you can see the results of that at the end of this post. (I have to remark that the lady I spoke to went out of her way to help me with this- great customer service!)
Since I didn’t know what was wrong at the moment, I tried to work with it and applied three layers of colour gel. Afterwards I applied the top coat, cured it, and it ended up looking like this:
The messy look is partially due to my impatience and lack of skill (I can’t apply nail polish perfectly to save my life), but of course the unusual contracting of the polish also made it pretty hard to get a clean look. Again, the more succesfull version is at the end of this post!
Afterwards I went over my nails with the cleanser again, to remove the sticky layer that’s left after curing.
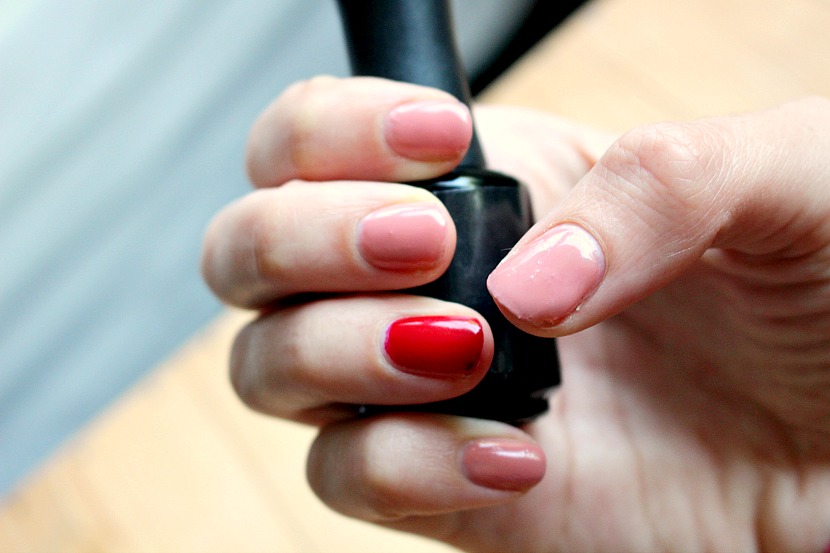
Here you can see it compared to the Sensationail polish on my ringfinger. The Sensationail set comes with a cleanser that you use as the first and last step, a primer, one gel that serves as a base and top coat, and the colour gel. This is the most expensive set out of the three, and as far as first impressions go, I found this one the most pleasant to work with. It did require more steps than the Madam Glam, which made it a bit more time consuming, but the end result is really nice and clean. It has a tiny brush which makes for very precise application.
On my other hand, I used the Essence Gel Nails At Home kit. This comes with a cleanser, a primer, a base coat, and a top coat. For the colour you just use your own nailpolishes. The downside is you need to apply as many coats of the nailpolish as you usually do and you need to wait for it to dry completely, which leaves more room for error and is pretty time consuming. But the fact that you can use ANY nailpolish you already have for this is awesome!
So, the second time I tried the Madam Glam gel polish I knew I had to remove the sticky layer in between each step. This did the trick!
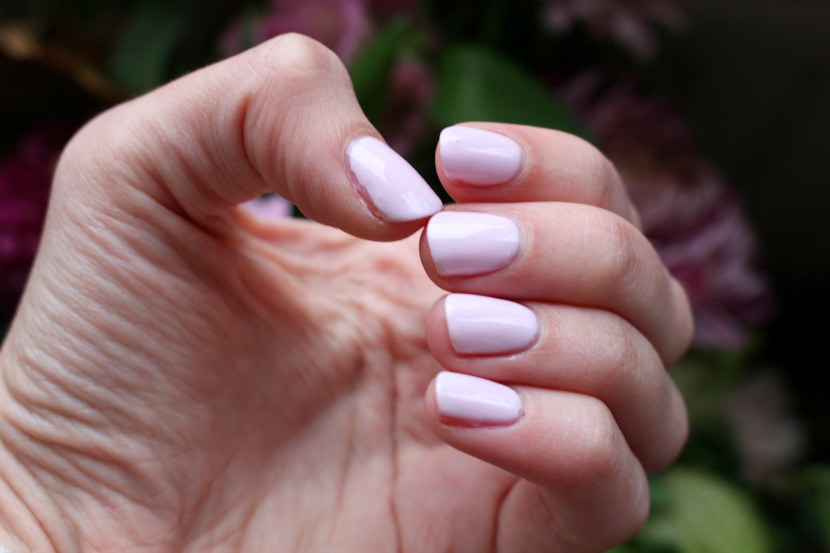

I have to say, it looks pretty amazing! The colour is beautiful and the gel feels really nice on the nails. The colour still needed three thin layers for full opacity.
As far as lasting goes, the Essence gel polish was the first to start chipping, after two days. It was easy and pretty much damage-free to pull off, apart from some tiny patches where a thin layer of nail came off with the polish. The Madam Glam lasts around three or four days on me without chipping, which may seem little for gel polish but keep in mind that regular nailpolish lasts me less than a day. This one was also really easy to remove, and this one gave the least damage to my nails. The Sensationail looked perfect until I removed it around 8 days later. Really impressed with that one! It was the hardest to remove though and also took a little layer off my nail in some places.
(You’re not actually supposed to pull of your gel polish but let’s be honest, we’ve all done it ;) Safe method is to soak it off with acetone!)
The Essence Gel Nails At Home comes in a starter kit of €9,99. This includes the primer, gel base, cleanser, and top coat. The lamp is sold for €29,95.
The Sensationail starter kit is €69,95 for the lamp and small sizes of the cleanser, primer, base & top coat, colour gel, manicure stick, nail file and fuzz-free cotton pads.
The Madam Glam gelpolish is $18,- a piece. You’ll need the top and base coat and a colour gel. You can get 30% off when you click here and enter the code YGEL30OFF at checkout (not an affiliate link)!
My friend and I had tea on the couch after the manicure session and when we returned to the table we found her kitty joining in on the fun :)
Have you ever done an at-home gel manicure? What’s the best brand you’ve used?


Loepsie Oh :(
I always do that, I think it looks nicer, but it doesn't make my nailpolish last longer :(
Looks great! :) But did you ever try putting nail polish on the edge of your nails as well (the top)? It's called "wrapping your tips," and ever since I started doing it my nail polish usually lasts for at least 3 or 4 days.